Last year, I posted ‘Elephants 3 – Another White Elephant, with Zebra (Mono)‘. That image was shot back in 2006, when I was using a Sony DSC-H1 Bridge Camera. I really liked the image, but the small sensor in that camera made it difficult to obtain much ‘selective focus’ and the image was too sharp from front to back.
Because I liked the image, particularly when presented in B&W, I decided to use a variation of it in a recent B&W Camera Club competition. I’ve often said that I am not much good at using Photoshop, but regardless of this limitation, I felt that I needed to try to simulate some ‘selective focus’ in this image if I was going to use it in a Club competition. I spent ages selecting different parts of the image and using layers to apply different levels of blur. I wish that I hadn’t bothered. The Judge didn’t like it, easily picking out those parts of the image that I had ‘worked on’. I just wasn’t clever enough! 😦
Last year, I purchased the Topaz Suite, but didn’t have the time of patience to learn how to use the various parts of it properly. This week, I thought that I would have a bit of a look at Topaz Detail 3, an application intended for selective sharpening of images. I’ve still got a lot to learn, and I still lack patience, but I have been very impressed at how this software can produce excellent results.
I thought that I would apply it to the original ‘jpeg’ file of that Elephant photo.
In this post, I have presented a series of efforts to improve this image. I hope that the differences are clear enough to show just what a ‘pigs ear’ I made of it before moving on to Topaz Detail 3. Here goes.
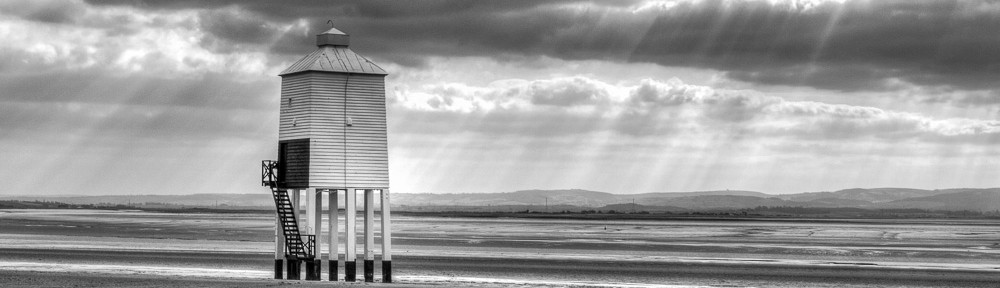
The first image is the jpeg straight out of my Sony DSC-H1

The next image was a B&W conversion using one of the Lightroom presets. I can’t remember which, but I was going for a fairly high contrast result.

The next image is where things really started to go wrong. I attempted to use my pathetic Photoshop skills to simulate some ‘selective focus’ in the image by using a number of layers with differing levels of Gaussian blur. It took a long time to select the elephant layer and the result wasn’t great.

It must be remembered that these last two B&W images were produced because I thought that the image lent itself to use in a Club B&W competition.
Some time later, after investigating Topaz Detail a little, I thought that the selective sharpening (and softening) available in this program might be useful for simulating ‘selective focus’. I gave it a try, and these next two images took only a few minutes to produce. Maybe there is scope for improvement, but I quite like them as they are.

After a few minutes work in Topaz Detail 3.

Here they are again in a carousel so they can be displayed at a larger size where the differences are more evident. Click on the first one to display the slide show. Esc to end it.
I think the attempt to simulate ‘selective focus’ in the Topaz worked images is more subtle and was certainly achieved much more quickly. Please feel free to comment as I know that I still have a very long way to go in improving my PP skills. In particular, I always have trouble deciding just how much of an adjustment to make.


